Build Your Own Blog: VPS, Docker, and Ghost

I wanted to set up my personal blog without breaking the bank while also honing my server hosting skills. After thorough research, I discovered a cost-effective approach – using a Virtual Private Server (VPS) along with Docker to run Ghost – that I'm eager to share.
Before we get started, let me mention this: If you're looking for a hassle-free way to start your blog without diving into the technical aspects, I highly recommend exploring the Ghost subscription instead of going through this post. The content here assumes that you're at ease with SSH, Docker, databases, etc. While managing your own server hosting gives you complete control, it also entails responsibilities like maintenance, backups, and migrations.
VPS + Docker + Ghost
Now, you might be wondering, why VPS? Unlike a dedicated server, a VPS utilizes virtual machine technology, allowing you to use a portion of the physical machine while sharing resources with other users. This setup works well if you don't expect a massive influx of traffic that would require a dedicated server. Check out the pricing from VULTR, a reputable VPS provider, and you'll see that it only costs $2.50 per month to run a small web server as of 2023.
| vCPUs | Memory | Bandwidth | Storage | Monthly Price |
|---|---|---|---|---|
| 1 vCPU | 0.5 GB | 0.5 TB | 10 GB | $2.50/mo |
| 1 vCPU | 1 GB | 1 TB | 25 GB | $5/mo |
| 1 vCPU | 2 GB | 2 TB | 55 GB | $10/mo |
But why go for a Docker? Ghost relies on a few open-source projects, such as SQLite, and Docker simplifies the management of those dependencies. When you're running your own server, it's vital to ensure your dependencies stay current with the latest security patches. Neglecting this can leave your server vulnerable to potential attacks. Thankfully, Docker keeps things streamlined, allowing you to effortlessly maintain various versions of the tools you're utilizing.
I have to admit that choosing blogging software is a bit more opinionated than the two options mentioned earlier, as the choice often boils down to personal preference. While WordPress dominates the market, it can overwhelm you with its multitude of options. Ghost, on the other hand, offers a more focused feature set with clean and minimalistic default themes. That's why we've chosen to use it in this post.
Step 1. Set Up VPS
First, you need to set up a VPS. VULTR is a recommended option due to its reasonable prices and good performance.[1]
Click "Deploy" button, then click "Deploy New Server".

Select "Cloud Compute," which is the best option for low-traffic blogs.

Select "Intel Regular Performance," which is the most affordable one at the time of writing.

Also, select one of the locations. Initially, consider starting with the lowest-priced tier to accommodate your current traffic. You can always upgrade later if necessary. Please note that the most affordable $2.50/month plan may not be available in all locations, so you may need to explore different server locations to find it.

Select "Debian". While there are other options available, this tutorial uses Debian as it is the default choice.

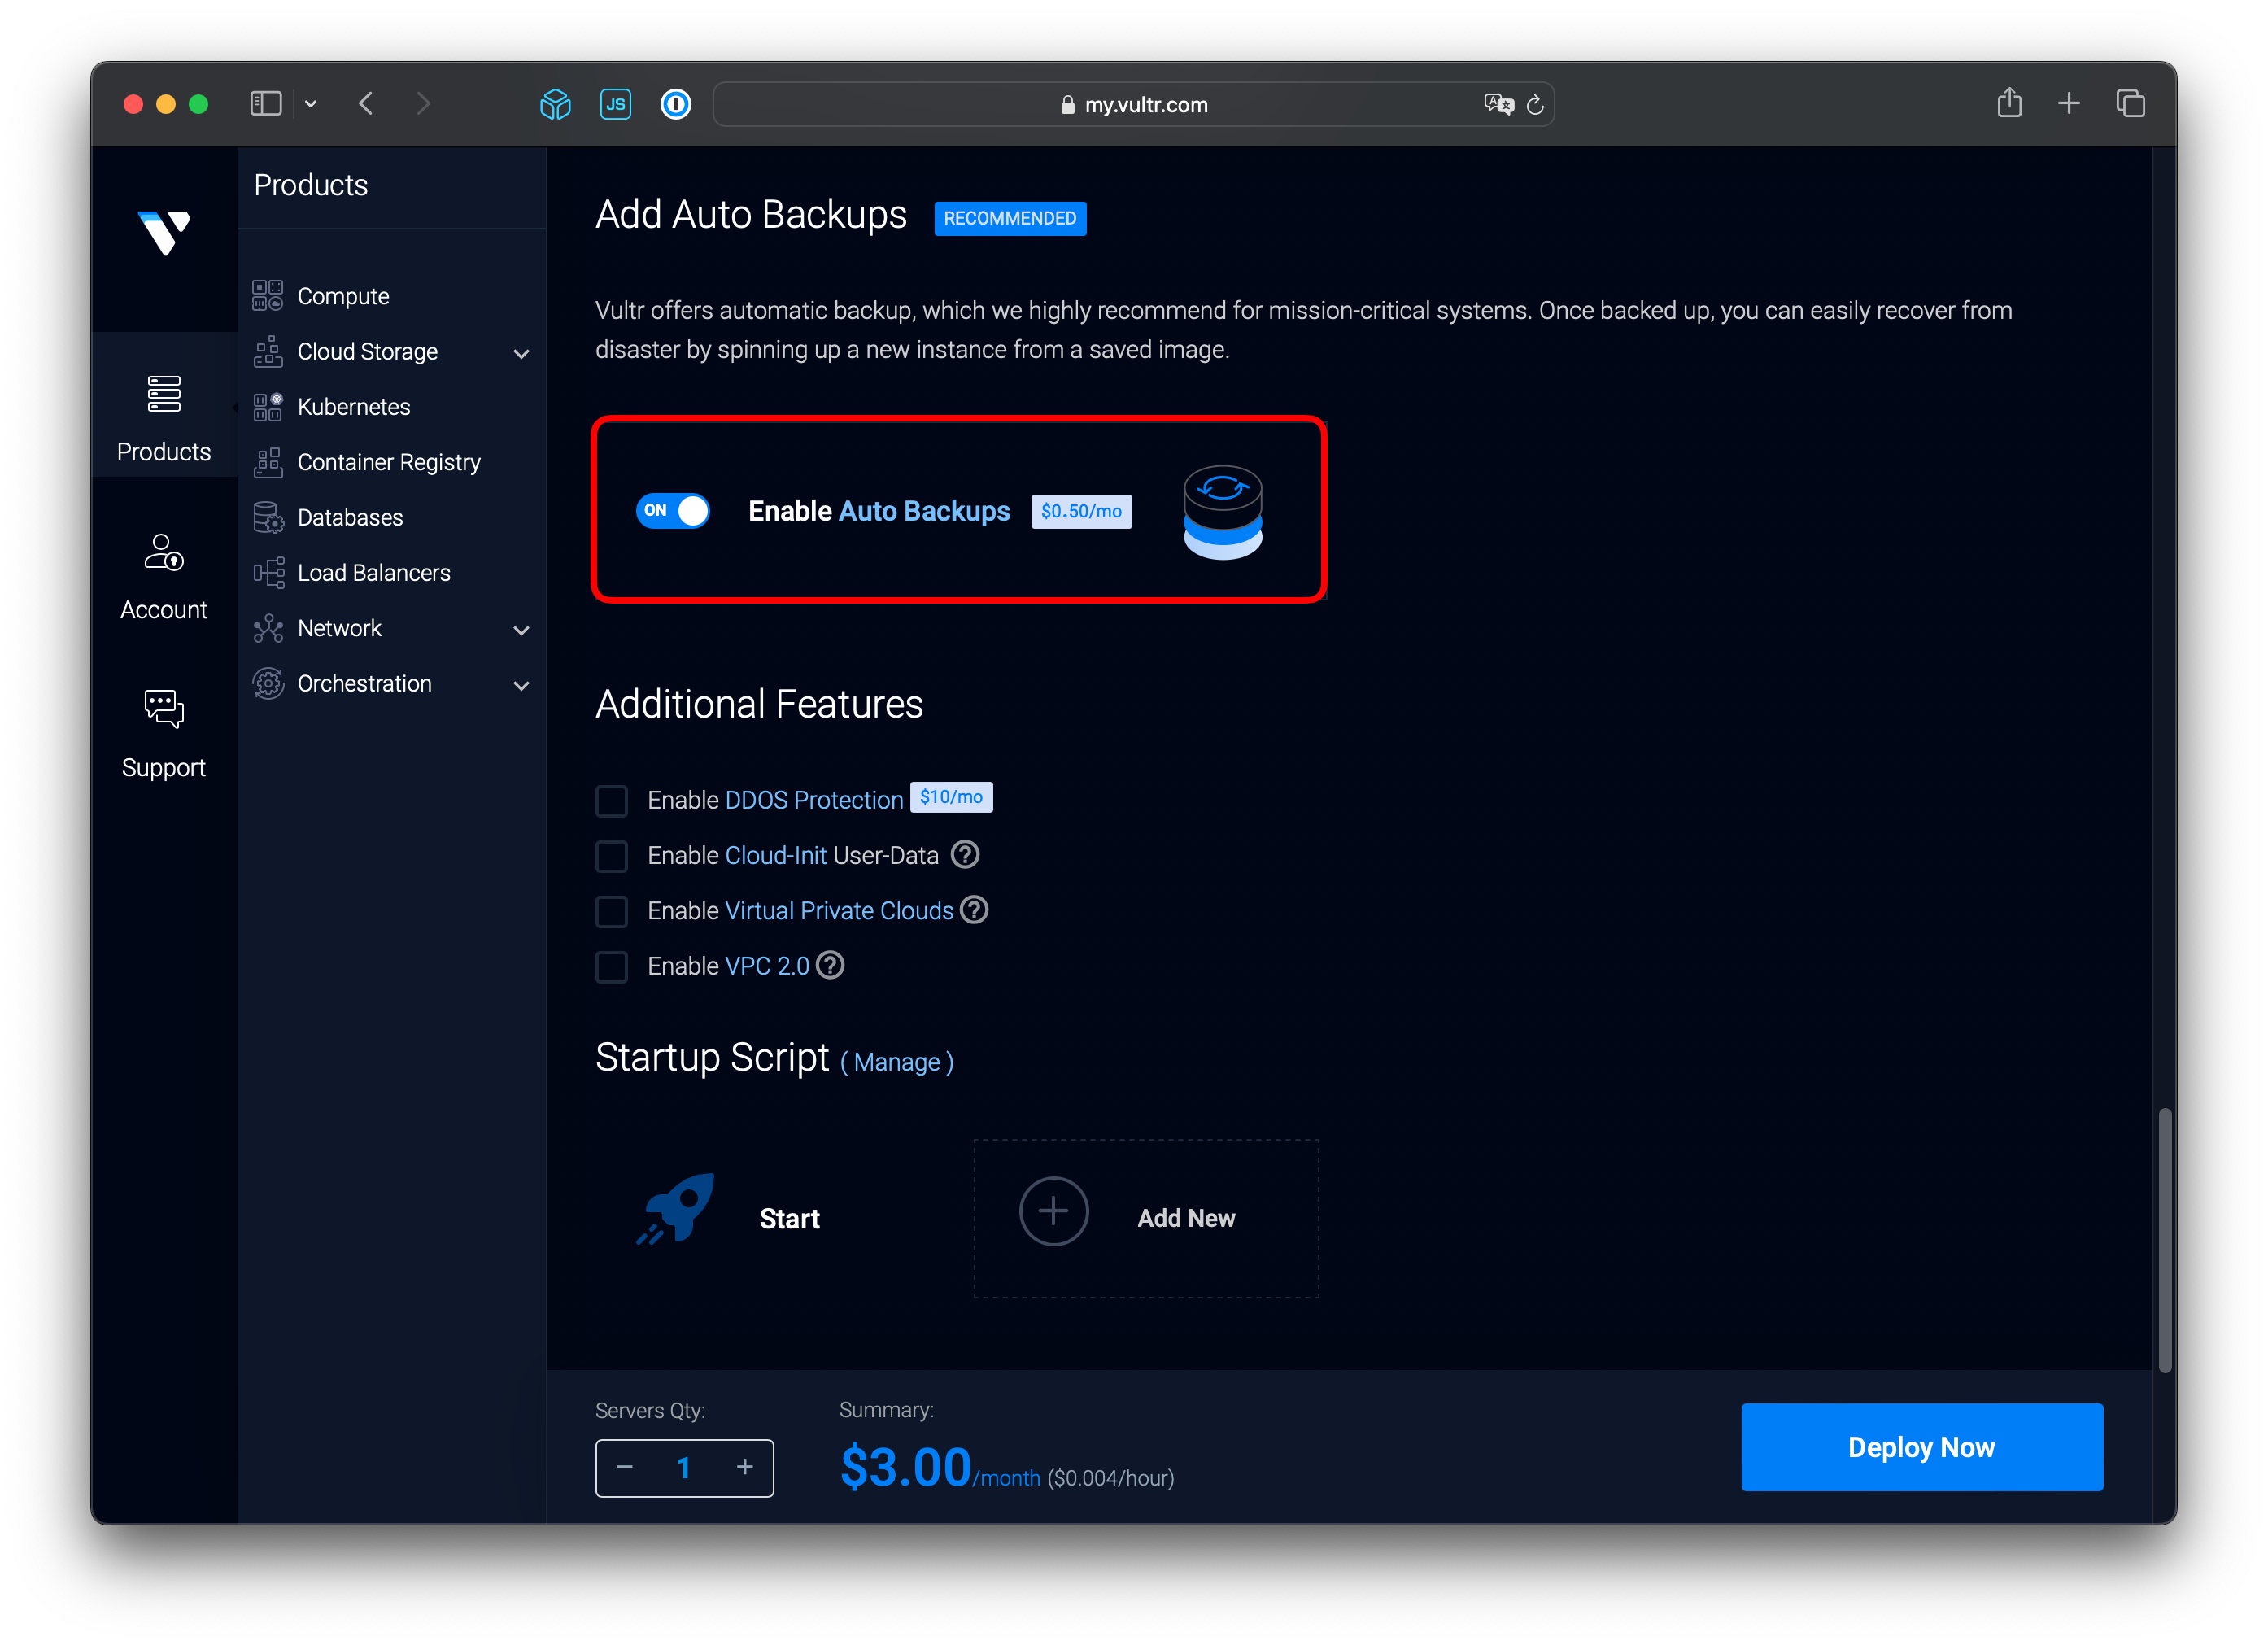
Select options. I recommend turning on Auto Backups, especially if you plan to use the VPS for hosting the database, which is exactly what we're aiming for here.
Enter the hostname and click "Deploy Now". Adding a hostname here will make it easier to connect to your domain later. If you don't have a domain yet, you can skip the hostname part.

After a few minutes, you can see that a new instance is up and running.

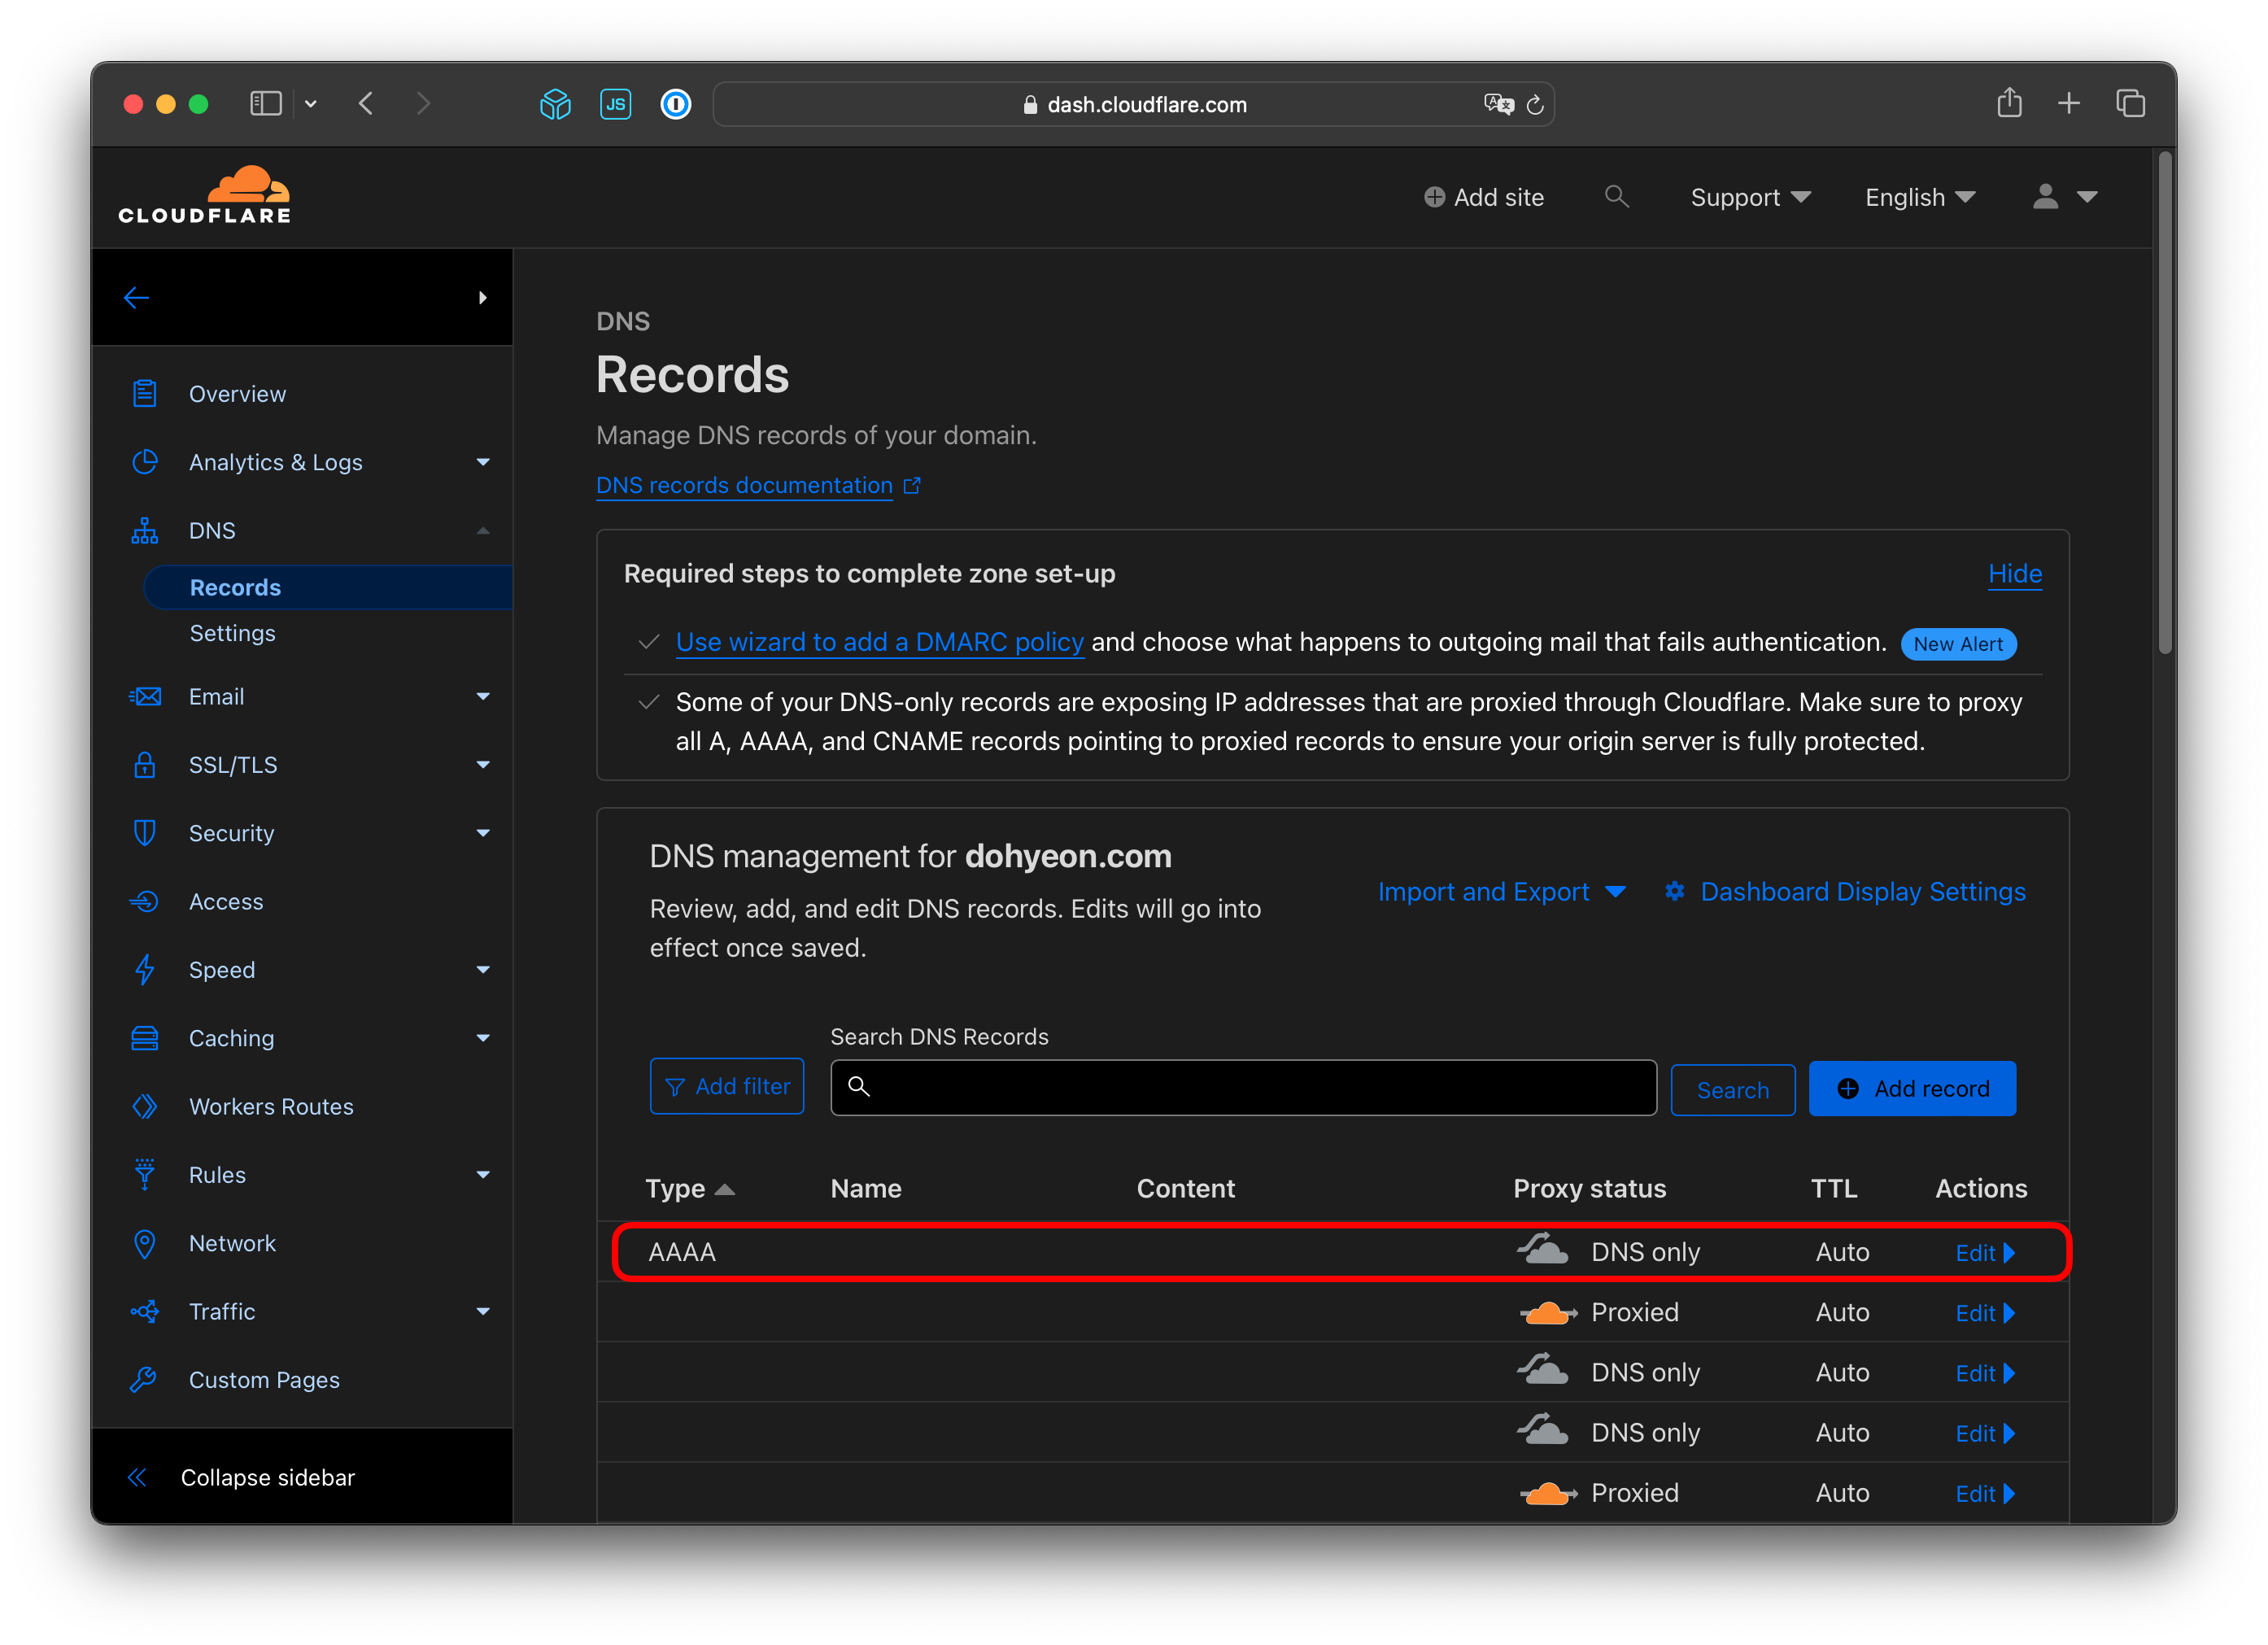
You can connect your domain to the newly created instance by adding an AAAA record with its IPv6 address.
Step 2. Set Up Debian with Docker
1. SSH
Now that we have a VPS instance up and running, it's time to configure the Docker environment. Let's connect to the instance using SSH.
ssh root@{server-ip-or-domain.com}If you are connecting to the new server for the first time, you will see the message below and have to confirm by typing yes to continue. You can use the root password from the VULTR overview page.
The authenticity of host 'example.com (...)' can't be established.
ED25519 key fingerprint is ...
This key is not known by any other names
Are you sure you want to continue connecting (yes/no/...)?
2. Install Docker Engine
After successfully connecting to the instance, you need to install Docker Engine. You can follow this official documentation to do it.
3. Install Docker Compose Plugin
Use this command to install Docker Compose Plugin.
sudo apt update
sudo apt install docker-compose-plugin
4. Create a Swapfile
Since your VPS only has 500 MB of RAM, it's a good idea to create a Swapfile so that the server does not crash when there is not enough memory.
fallocate -l 1G /swapfile
chmod 600 /swapfile
mkswap /swapfile
swapon /swapfile
To make it permanent, add this line at the end of the /etc/fstab file.
/swapfile swap swap defaults 0 0Step 3. Set Up Ghost
1. Create the Data Folder
Let's create a data folder for the new blog. This will be used to store the SQLite database, images, etc. For your awareness, we've used SQLite in this post for its simplicity. However, if you're considering a production environment, MySQL would be the better choice.
mkdir -p /var/lib/ghost/blog2. Config Docker Compose for Ghost
Now, we can create a YAML file named docker-compose.yml in your home folder.
services:
  nginx-proxy:
    build: ./nginx-proxy
    depends_on:
      - blog
    ports:
      - "80:80"
      - "443:443"
    volumes:
      - /var/run/docker.sock:/tmp/docker.sock:ro
      - /var/web/ssl:/etc/nginx/certs:ro

  blog:
    image: "ghost:${GHOST_VERSION}"
    expose:
      - "2368"
    environment:
      - VIRTUAL_HOST=example.com
      - url=https://example.com
      - database__client=sqlite3
      - database__connection__filename=/var/lib/ghost/content/data/ghost.db
    volumes:
      - /var/lib/ghost/blog:/var/lib/ghost/content
You can create an .env file to specify the Ghost version. You can find the released versions on this Docker Hub page. It's better to use a specific version to prevent automatic migrations from occurring.
GHOST_VERSION=5.65.0In the future, if you'd like to update the Ghost version, please make sure you have a backup from VULTR so that you can revert changes if any issues occur. Also, it's a good practice to remove old Docker images, as your VPS has limited storage.
We use nginx-proxy to map the domain to the blog instance. You can even create multiple blog instances using this structure. Since we'd like to override some of the default behavior, including the maximum upload size, let's create the Dockerfile under the ~/nginx-proxy folder.
FROM jwilder/nginx-proxy:latest
RUN { \
    echo 'server_tokens off;'; \
    echo 'client_max_body_size 100m;'; \
    } > /etc/nginx/conf.d/my_proxy.conf
3. Allow HTTP/HTTPS Ports
HTTP/HTTPS ports are blocked by the firewall by default. You can use this command to allow them.
ufw allow http
ufw allow https
4. Run Ghost
Now you can execute this command to run the instance.
docker compose up -d5. Connect to Ghost
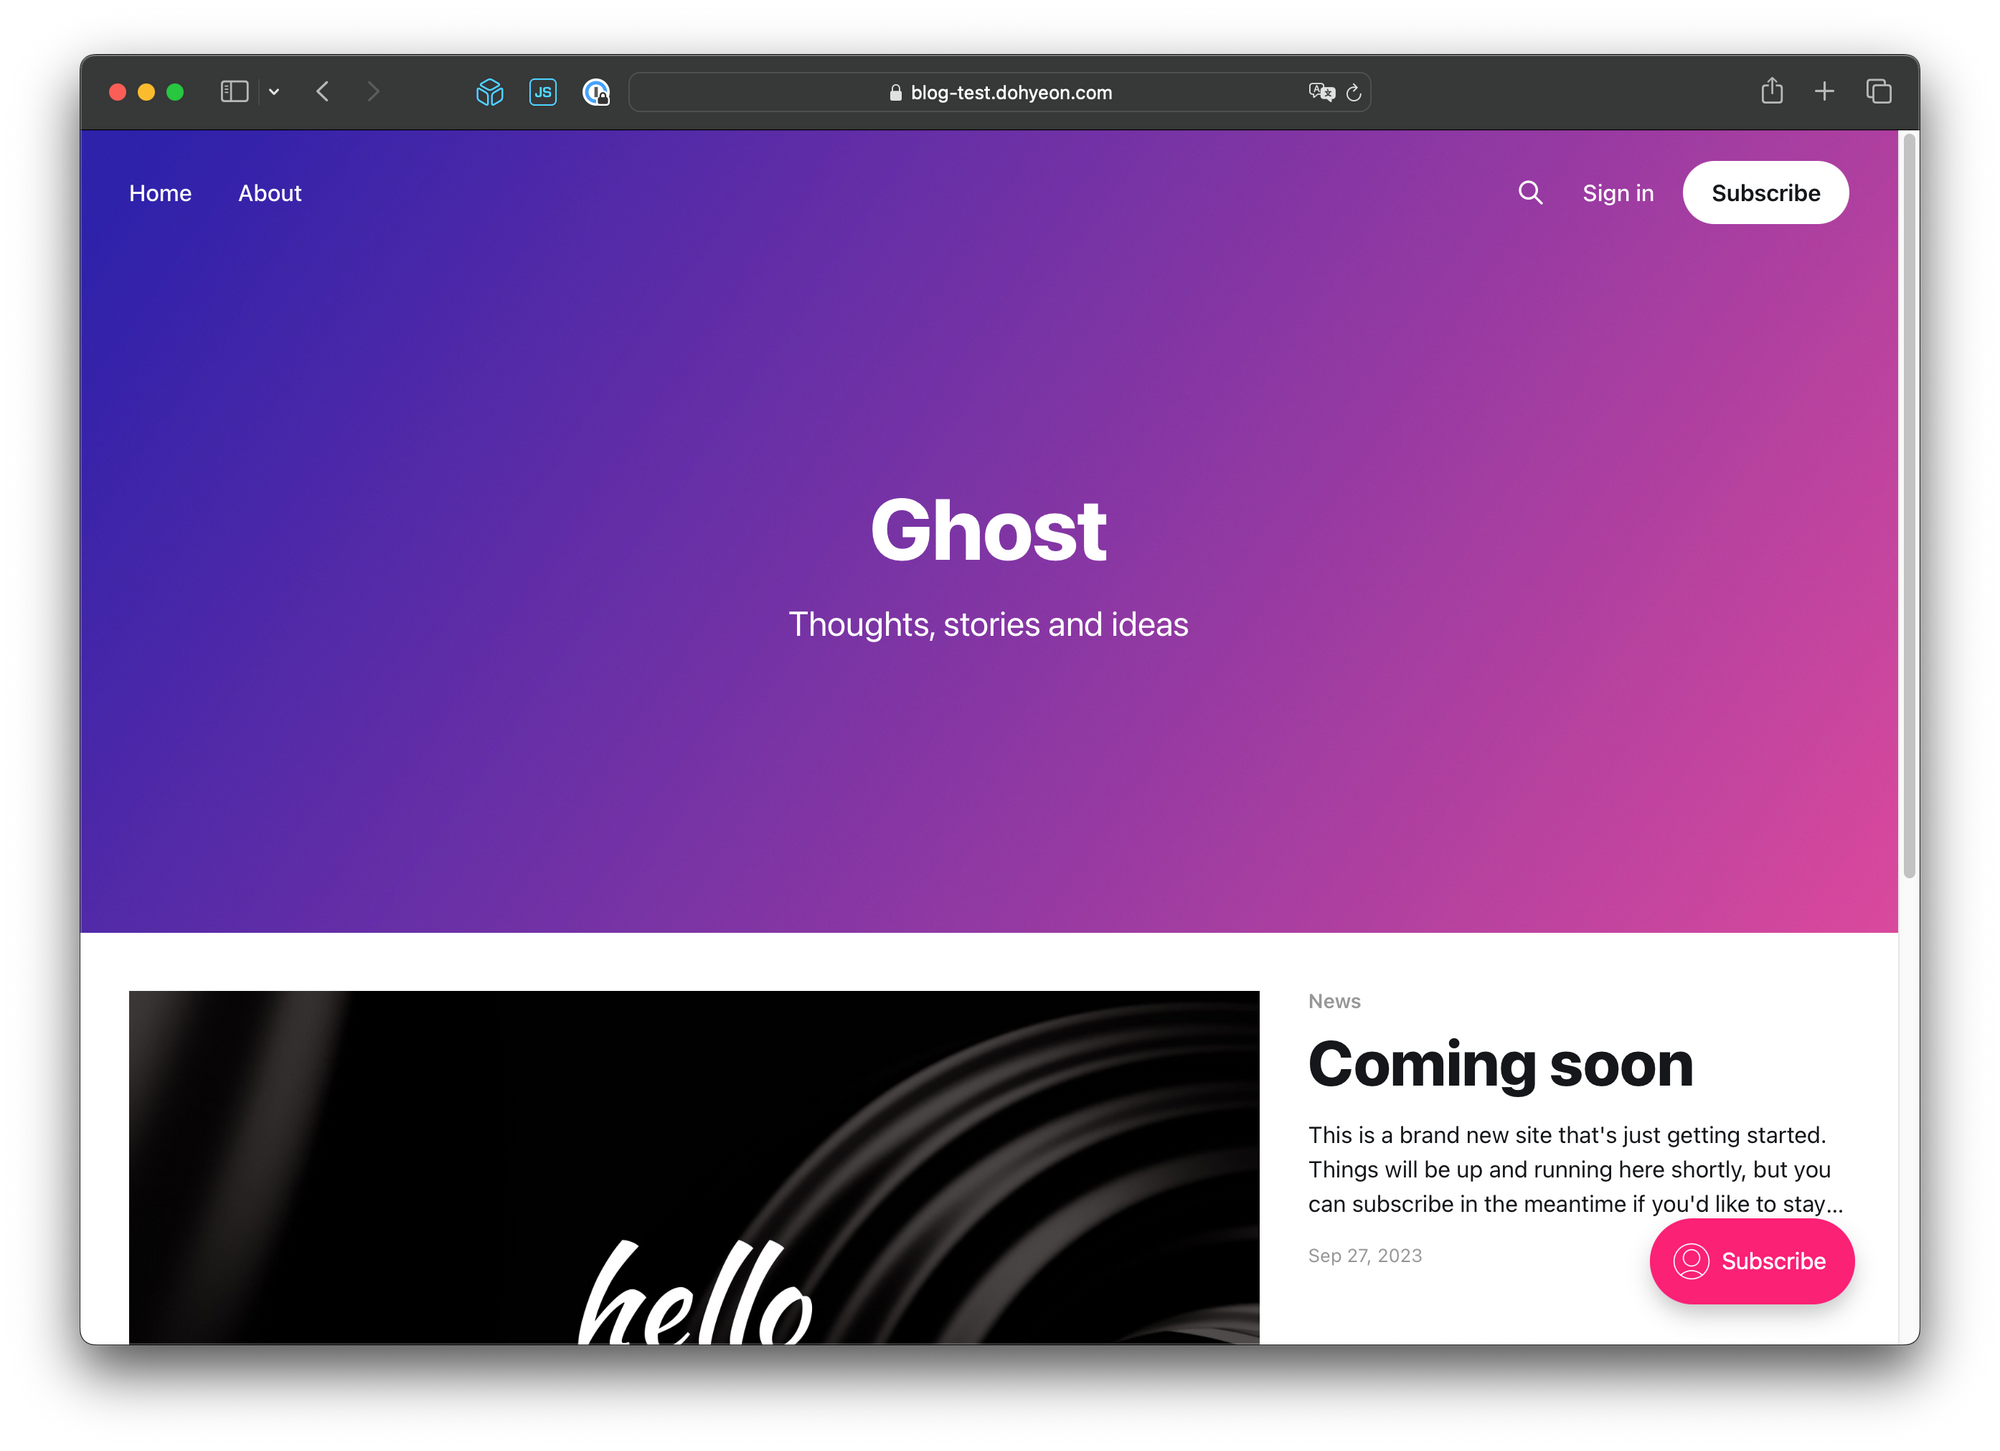
You can connect to your domain to view this initial page.
You can connect to the admin page by adding /ghost at the end of the URL.
https://example.com/ghost

6. Write & Publish
You can tweak the other settings, but you can also jump right into writing.
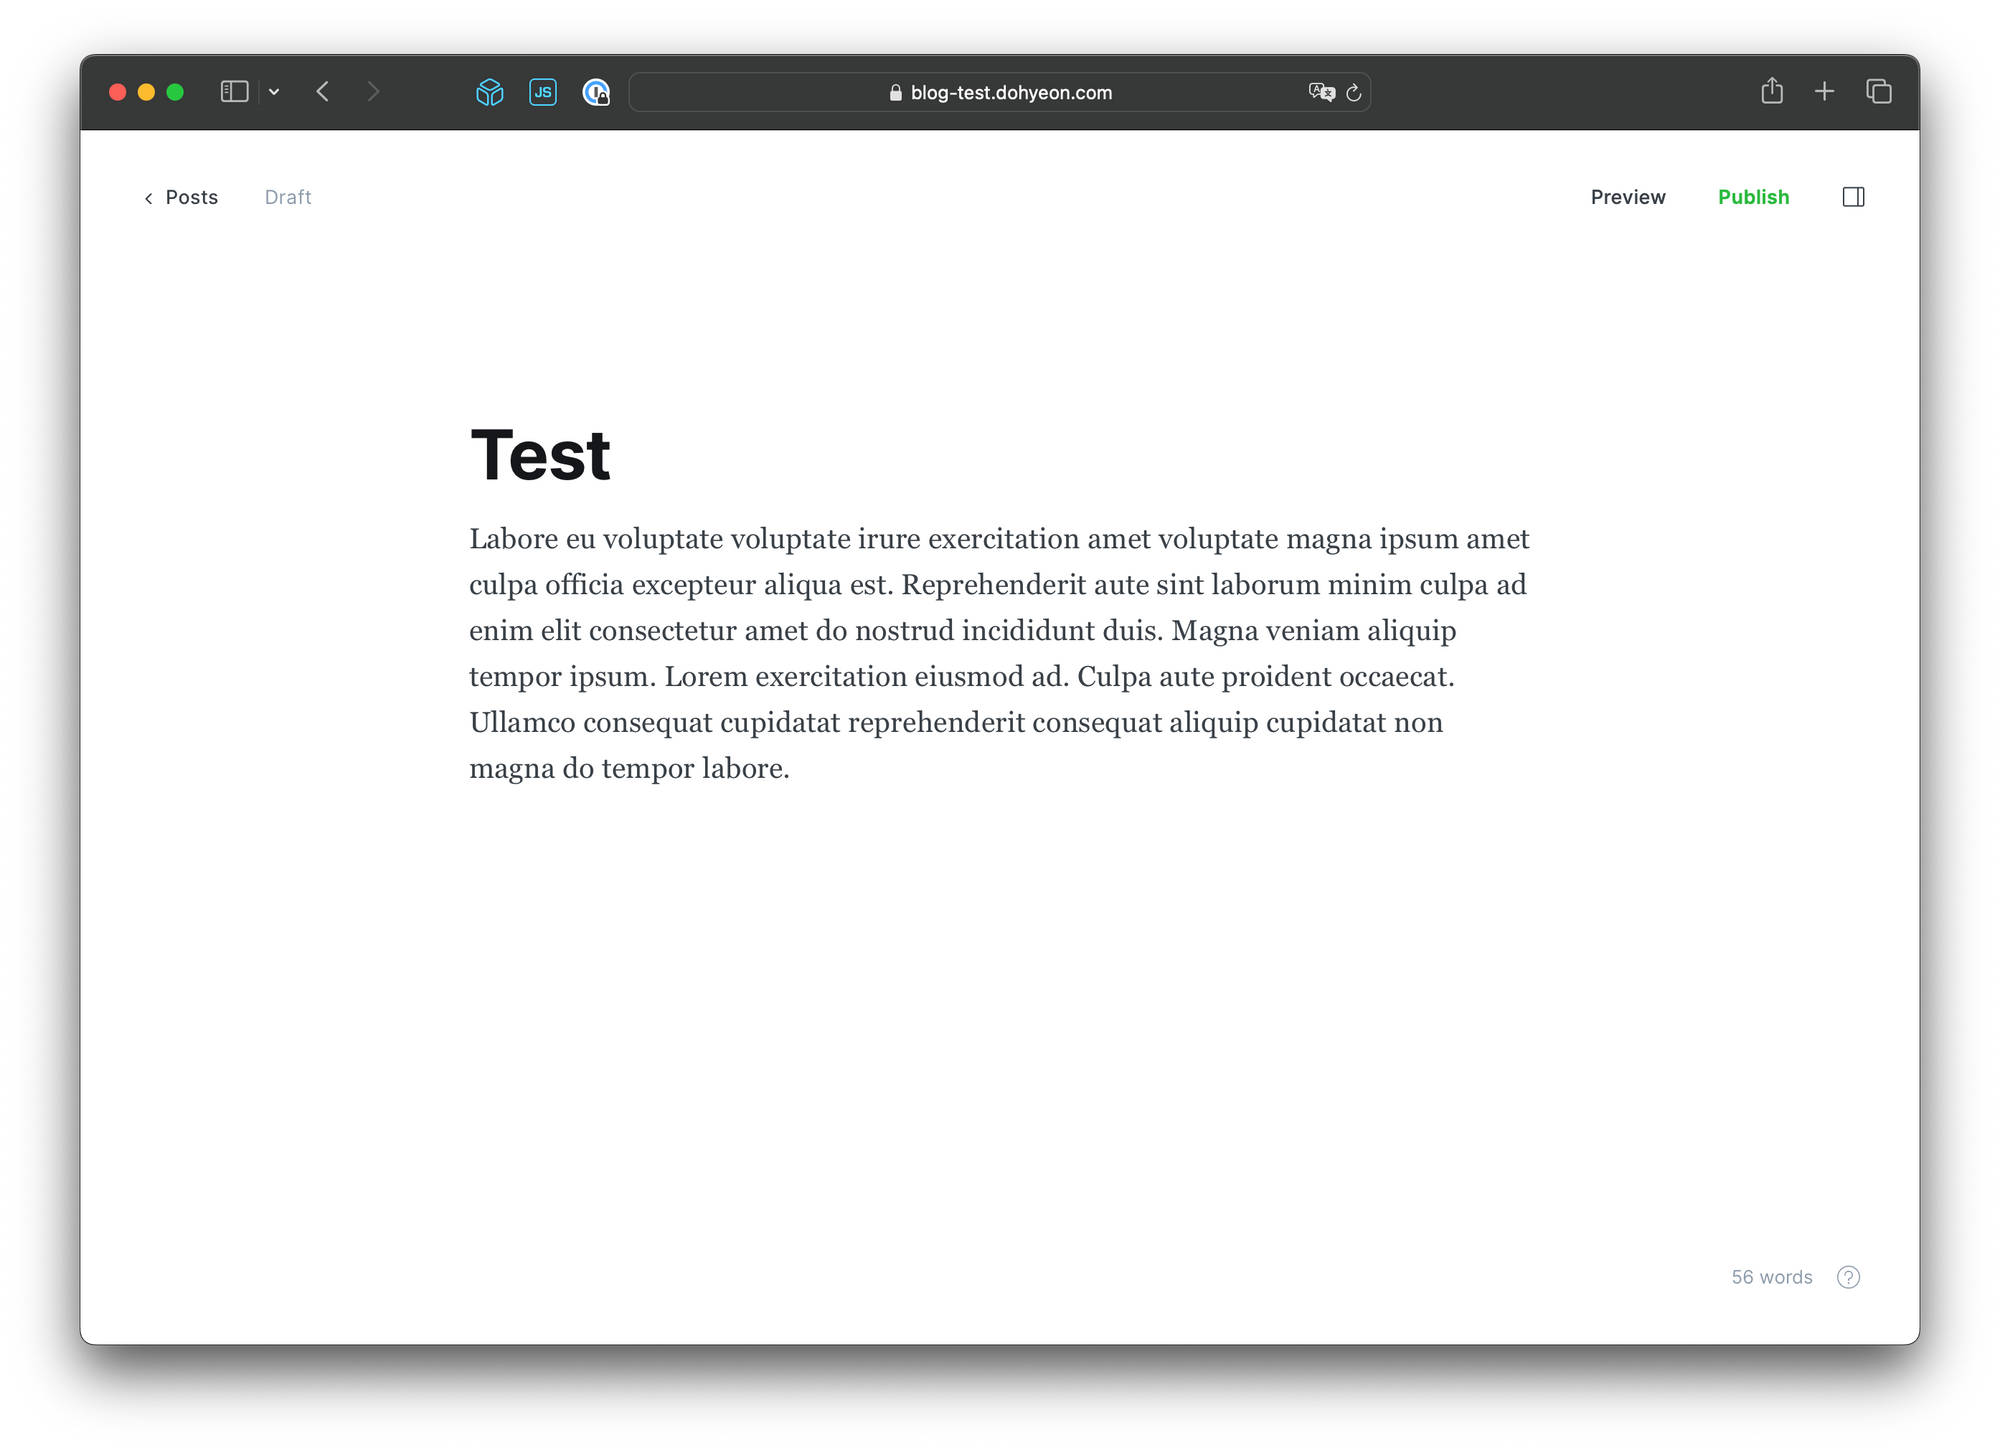
Congratulations! You have your own blog instance up and running.

Resources
[1] Disclaimer: This post contains affiliate links. This means I may earn a commission should you chose to sign up for a program or make a purchase using my link.